Wireless security cameras make installing a home surveillance system easier than ever. Bunker Hill offers versatile wireless cameras with handy features like mobile viewing, motion detection alerts, and night vision.
This comprehensive guide will explore everything you need to know about Bunker Hill wireless cameras – from useful features to setup tips, placement strategies, maintenance best practices, and troubleshooting common issues.
Let’s dive in to see why wireless security cameras are the convenient, affordable way to protect your home!
An Introduction to Bunker Hill Wireless Security Cameras
Bunker Hill offers a lineup of wireless indoor and outdoor security cameras that connect to your WiFi network to enable flexible placement without the need for power or video wiring.
Key features of Bunker Hill wireless cameras include:
- Wireless connectivity – Connects to your 2.4Ghz WiFi network for quick installation anywhere.
- Remote monitoring – View live feeds and recordings remotely via smartphone app.
- Motion activation – Alerts and recording triggered by detected movement.
- Night vision – Infrared LEDs enable clear footage in low light and at night.
- HD video – Capture events in high-definition 720p or 1080p quality.
- Expandability – Add multiple cameras on one system with the ability to view all feeds through a single user interface.
Wireless cameras free you to install surveillance precisely where you need it without wiring hassles. Let’s look at popular types of wireless cameras Bunker Hill offers.
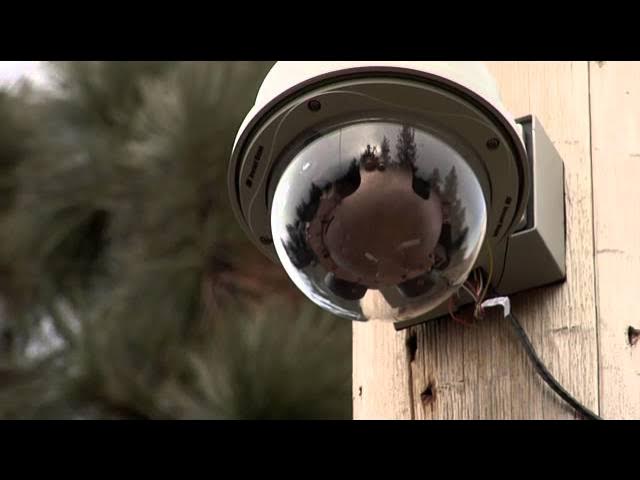
Types of Bunker Hill Wireless Cameras
Bunker Hill wireless cameras come in both indoor and outdoor models to cover any part of your property:
- Indoor cameras – Designed to monitor interiors and protected spaces while blending into your home’s decor. Offer wide angle views andIR night vision. Require access to a power outlet.
- Outdoor cameras – Weather resistant for all-season exterior monitoring. Have features like waterproof housings and weatherized cabling. Can be battery powered or wired.
- Video doorbells – Doorbell cameras that enable video intercom, motion alert recordings, and remote monitoring of your front door area. Offer convenience and security.
- PTZ cameras – Pan, tilt, zoom functionality allows remotely adjusting the viewing angle via app controls. Ideal for monitoring large, open spaces.
- Hidden cameras – Disguised as everyday household objects like clock radios or books for discreet, low-profile security.
With the right mix of wireless camera types tailored for your needs, you can monitor both interior and exterior areas without hassles.
Key Features to Look for When Buying
When shopping for Bunker Hill wireless security cameras, keep these key features in mind:
- Resolution – Look for HD 720p or 1080p video quality to capture critical details clearly.
- Night vision – Infrared LEDs enable capturing footage in low-light and zero-light conditions.
- Smart motion detection – Receive mobile alerts and recordings only when true events occur based on customizable motion zones.
- Bandwidth efficiency – Video automatically adjusts streaming quality based on your available WiFi bandwidth. Prevents lag and pixilation.
- Weatherproofing – Outdoor cameras must withstand all weather conditions and tampering from would-be intruders.
- Power options – Can be powered via electrical outlet, PoE, or built-in rechargeable battery depending on the model.
- Expandability – Choose a scalable system that allows adding cameras as your needs evolve.
Seeking cameras with the right features for your space results in reliable, high-performance security.
Step-by-Step Guide to Setting Up a Bunker Hill Wireless Camera
Installing wireless security cameras is a straightforward DIY project. Here are the key steps:
1. Select Camera Locations
- Walk your property and identify ideal indoor/outdoor placement based on vantage points.
- Note any obstacles that may interfere with WiFi signals like thick walls and electrical devices.
- Consider access to power outlets or areas you can use battery-powered cameras.
2. Mount the Camera
- Use included mounting hardware (brackets, screws, anchors) to install the camera securely.
- Adjust position so the viewing angle captures the key area you want to monitor clearly.
3. Connect it to Power
- For outlet models, plug the adapter into a nearby power source using cord covers to conceal the wire.
- For battery models, ensure the battery is fully charged prior to mounting according to instructions.
4. Connect the Camera to WiFi
- On your smartphone, download the app recommended in the camera instructions.
- Create an account and follow the in-app pairing process to add the camera to your WiFi network.
- Ensure your WiFi password is entered correctly to complete the connection.
5. Adjust Settings as Desired
- Use the app to pan and tilt PTZ cameras to set the default view.
- Customize preferences for motion detection zones, notifications, recording modes, night vision, etc.
And that’s it – you now have wireless surveillance set up and accessible from your smartphone! Now let’s go over some pro tips and maintenance best practices.
Wireless Camera Placement Tips and Strategies
Proper camera placement is key for security and performance. Follow these tips when siting your wireless cameras:
- Place near power outlets when possible to keep battery-powered models consistently charged.
- Ensure adequate overlap in coverage between cameras to avoid blindspots.
- Position high out of reach (8-10 ft) for a wide vantage point unlikely to be obstructed or tampered with.
- Avoid aiming at light sources or windows to prevent glare that obscures details.
- If using battery models, choose protected locations not prone to temperature extremes that can shorten battery life.
- Check that WiFi signals are reliably strong in the camera’s location and can support streaming.
Taking time to find the optimal placement extends your camera’s effectiveness and recording longevity.
Maintenance Tips for Reliable Operation
Follow these tips to keep your wireless security cameras running optimally:
- Periodically check that outdoor cameras remain tightly mounted and casing seals remain intact. Re-tighten any loose hardware.
- Clean camera lenses using proper techniques and microfiber cloths to avoid damaging protective coatings.
- Check motion detection settings and fine tune sensitivity to reduce false alerts while still capturing events.
- Update camera and app firmware when new versions are released for latest features and security patches.
- Format the SD card every 6 months to a year to ensure it maintains optimal performance.
- For battery models, charge batteries fully about every 3-4 months during inactive periods to maximize lifespans.
Proactive maintenance goes a long way in extending the usable life of your wireless cameras. Be sure to monitor them regularly!
Troubleshooting Common Wireless Camera Issues
In the event your wireless camera acts up, try these troubleshooting tips:
No video feed
- Check WiFi connection and reconnect if needed. Move WiFi extenders closer.
- For battery cameras, ensure batteries are charged. Replace if depleted.
- Power cycle the camera and check for activity lights to confirm power flow.
Grainy, low-quality video
- Try moving the camera closer to the WiFi router or access point.
- Reduce streaming resolution to accommodate limited bandwidth
- Change the wireless channel on the camera and router to reduce interference.
False motion alerts
- Tweak motion sensitivity zone settings more precisely.
- Set a motion detection delay so alerts aren’t triggered by quick movements.
- Add a “Detection Schedule” to limit alerts during certain periods.
Battery won’t hold charge
- Batteries may need replacement after 1-2 years. Only use recommended models.
- Ensure batteries are not exposed to temperature extremes that can shorten lifespan.
Catching issues early allows you to resolve them before they become larger problems. Get familiar with troubleshooting guidance in your camera’s user manual as well.
Designing the Ideal Wireless Camera Setup
A single camera provides some protection, but a thoughtfully designed wireless system is best for complete property coverage. Follow these tips:
- Camera Types – Choose a mix like domes for interiors and bullets for perimeter monitoring based on vantage points needed.
- Locations – Ensure key vulnerable areas like doors, gates, and dark corners are within cameras’ fields of view.
- Night Vision – Place cameras to record any approaches under night vision, or add motion-activated lighting.
- WiFi Coverage – Survey signal strength to confirm cameras have solid connections, adding extenders if needed.
- Power – For battery models, situate near exterior outlets to make recharging convenient.
- Signage – Post notices to benefit from cameras’ deterrence effects even if not actively monitoring feeds.
A strategically designed camera setup tailored for your property results in robust, comprehensive security.
Enjoy Enhanced Protection with Wireless Security
Wireless security cameras make protecting your home simpler than ever with painless installation, flexible placement, and remote monitoring from anywhere. Bunker Hill cameras pack powerful features into affordable packages.
Use this guide to demystify selecting the ideal wireless models for your needs and skill level. Follow the setup process, placement strategies, and maintenance tips to maximize performance. Soon you’ll be reaping the benefits of robust wireless monitoring and protection. Discover why more homes and businesses are embracing wireless security camera systems!